Getting Started
This guide walks you through running aMule for the first time, from the first-run setup wizard to downloading and sharing your first files. You don't need to be familiar with the underlying networks to follow it, but you do need aMule installed on your computer.
Each step links to the detailed reference pages in the User Manual if you want to go deeper.
aMule makes extensive use of right-click context menus. If you can't find a function, try right-clicking on the item you wish to manipulate.
1. Install aMule
If you haven't installed aMule yet, see the Installation guide for platform-specific instructions.
Launch aMule from your desktop environment's menu, or by running amule in a terminal. On the first start, aMule first shows a short Info message (This is the first time you run aMule …) with links to the website and the issue tracker; it shows the same message the first time you run each new version. Close it with OK, and aMule opens the setup wizard described below before it connects to any network.
2. Run the setup wizard
The aMule first-run setup wizard collects the handful of settings aMule needs before it goes online. Use Next and Back to move between its pages and Finish on the last one. Every choice can be changed later in Preferences.
aMule has no menu entry or command-line option to reopen the wizard. To run it again on an existing install, close aMule and set FirstRunWizardDone=0 in the [eMule] section of amule.conf; the wizard opens on the next start.
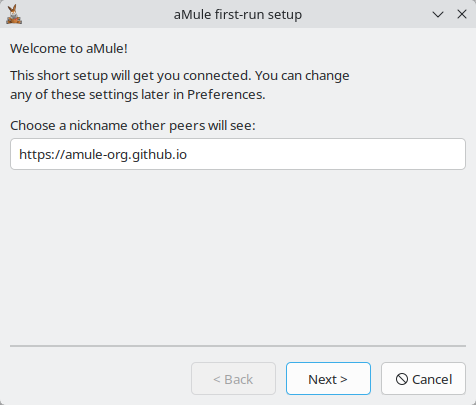
Nickname
Choose the nickname other peers see in their client lists and chat windows.
Connection & bandwidth
Pick the entry in Connection speed that best matches your Internet line, or keep Other / set manually and type the Upload limit and Download limit yourself. Values are in KiB/s; 0 means unlimited.
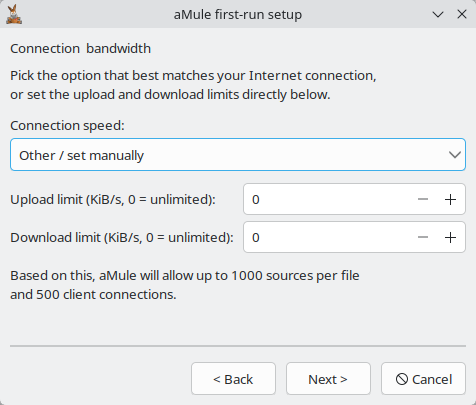
The presets cap the upload at about 80% of the line's upstream and leave the download unlimited; Fibre Gigabit leaves the upload unlimited too, so type an upload limit yourself if you choose it. The line below the fields shows the sources per file and client connections aMule will allow for that line.
Setting a realistic upload limit is strongly recommended: an uncapped upload can starve every other application sharing the link and even slow down your own downloads. If your line is not in the list, set the upload limit to roughly 80% of your actual upstream speed and the download limit to about 80% of your downstream speed or to 0. ISP speeds are usually advertised in megabits per second (Mbps) — to convert to KiB/s, multiply the Mbps figure by 122.
Example: a 600 Mbps / 100 Mbps fibre line ≈ 73,200 KiB/s down / 12,200 KiB/s up. Set the limits to about 58,000 down / 9,800 up to stay below the line cap.
The eD2k network rewards sharing: your maximum download speed is tied to your upload limit. See Slow Download Speeds for the details.
You can change the limits later in Preferences → Connection.
Networks & ports
aMule can connect to two networks at the same time. Keeping both enabled is recommended:
- eD2k — the classic server-based eDonkey network.
- Kademlia (Kad) — a serverless, distributed network that works without relying on central servers.
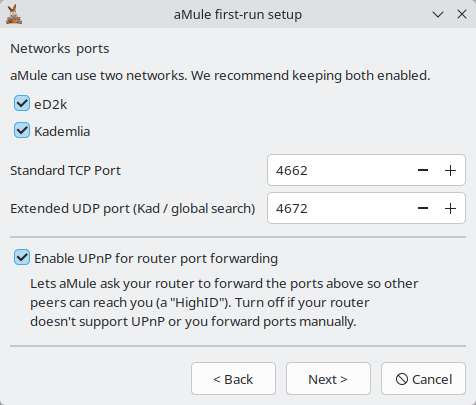
The same page sets the Standard TCP Port (default 4662) and the Extended UDP port used by Kad and global searches (default 4672). Keep the defaults unless you have a reason to change them — you will need these numbers if you forward ports on your router. Enable UPnP for router port forwarding (checked) lets aMule ask your router to forward those ports for you; turn it off if your router does not support UPnP or you forward the ports manually.
Bootstrap files
To find its first peers, aMule needs an eD2k server list (server.met) and a list of Kad nodes (nodes.dat). Keep both boxes checked to download them.
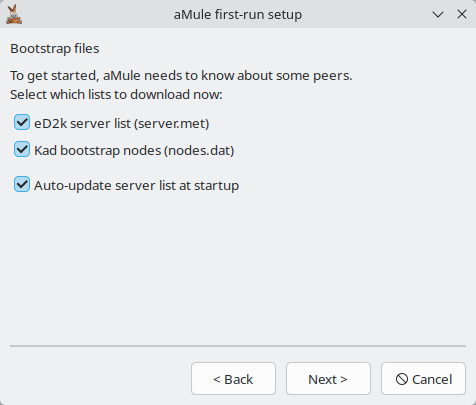
Auto-update server list at startup only takes effect once you add at least one server list URL with the List button in Preferences → Servers; the one-time download above does not depend on it.
Integrations (optional)
This page connects aMule to your desktop:
- Start aMule automatically when I log in — launch aMule with your desktop session.
- Register aMule for ed2k:// links — open
ed2k://links clicked in a browser or file manager in aMule. - Register aMule for magnet: links — aMule only handles eD2k-compatible magnet links, so leave this off if you use a BitTorrent client.
- Open .emulecollection files with aMule — open eMule collection files from the file manager.
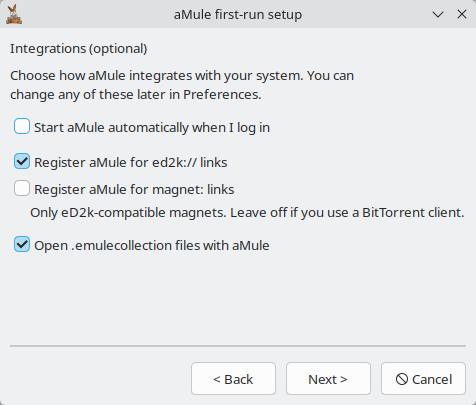
You can change these later in Preferences → General. See Starting aMule Automatically and eD2k and Magnet Links for details.
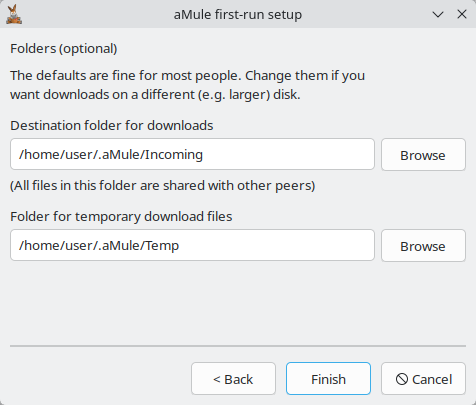
Folders (optional)
The last page sets the Destination folder for downloads (the Incoming directory, where finished files go) and the Folder for temporary download files (the Temporary directory, where in-progress downloads live). The defaults are fine for most people; change them if you want downloads on a different, larger disk. Remember that every file in the Incoming folder is shared with other peers.
Finishing or cancelling the wizard
Click Finish to save your choices. aMule then starts up and downloads the bootstrap files you selected.
If you close the wizard with Cancel instead, aMule asks whether to show the setup wizard again the next time you start aMule. Either way it starts with the settings it already had and downloads nothing, so fill the server list by hand. If you answered No, later starts show a small Network bootstrap dialog instead, offering to download any list that is still missing.
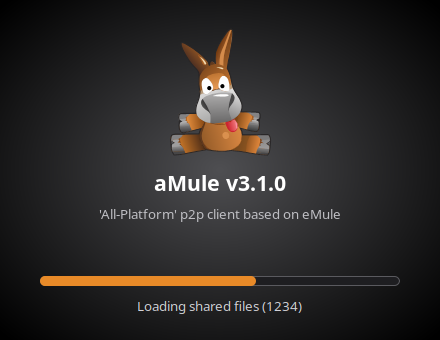
After the wizard: startup screen
While aMule loads your downloads and scans your shared files, it shows a startup screen with a progress bar. The main window opens when the scan is done.
3. Connect to the networks
If you let the wizard download the bootstrap files, there is nothing else to do: aMule connects to an eD2k server as soon as the server list arrives, and starts Kad once the nodes list is in place. On later starts, Autoconnect on startup in Preferences → Connection (on by default) connects both enabled networks automatically.
Wait until aMule reports a successful connection before searching; the status bar at the bottom of the window shows your eD2k server and Kad state once you are connected.
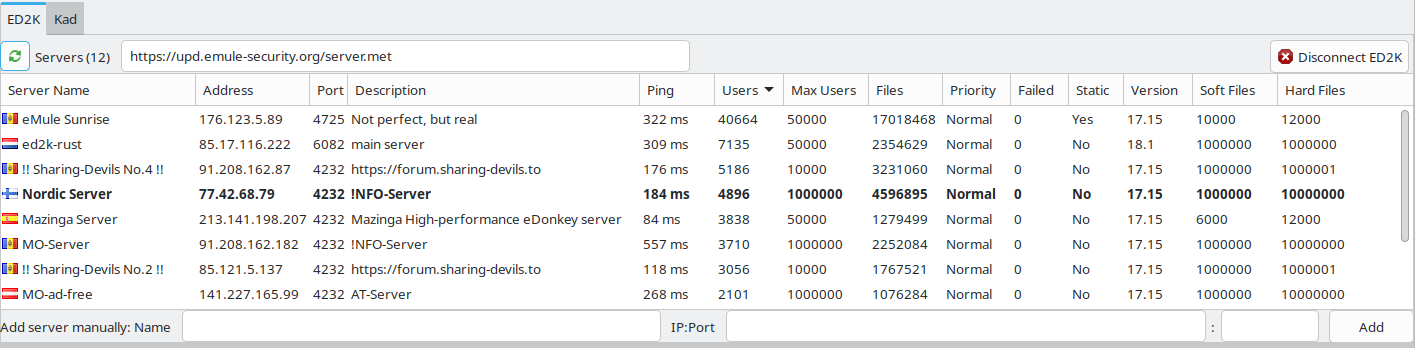
To connect or disconnect by hand, open the Networks window: each network has its own button at the top right of its tab — Connect ED2K on the ED2K tab and Connect Kad on the Kad tab. The Connect entry of the system tray menu connects both enabled networks at once.
If you skipped the server list download, click the URL text field at the top of the ED2K tab (e.g. https://upd.emule-security.org/server.met) and press Enter to populate the server list; aMule connects once the list has downloaded:
For Kad without a nodes list, see Updating the Nodes List from a URL.
High or Low ID
P2P networks need clients to reach each other directly, so a firewall or router that blocks aMule's ports can cause problems. Check the globe icon in the bottom-right corner of the window:

- Green arrows — you have a High ID and full connectivity. Proceed normally.
- Yellow arrows — you have a Low ID, which greatly reduces performance. You'll need to open and forward aMule's ports. See Network Connectivity for step-by-step instructions.
4. Search and download
Once connected, click the Searches button to open the Searches window. Enter a term in the Name field, pick a search type, and press Enter:
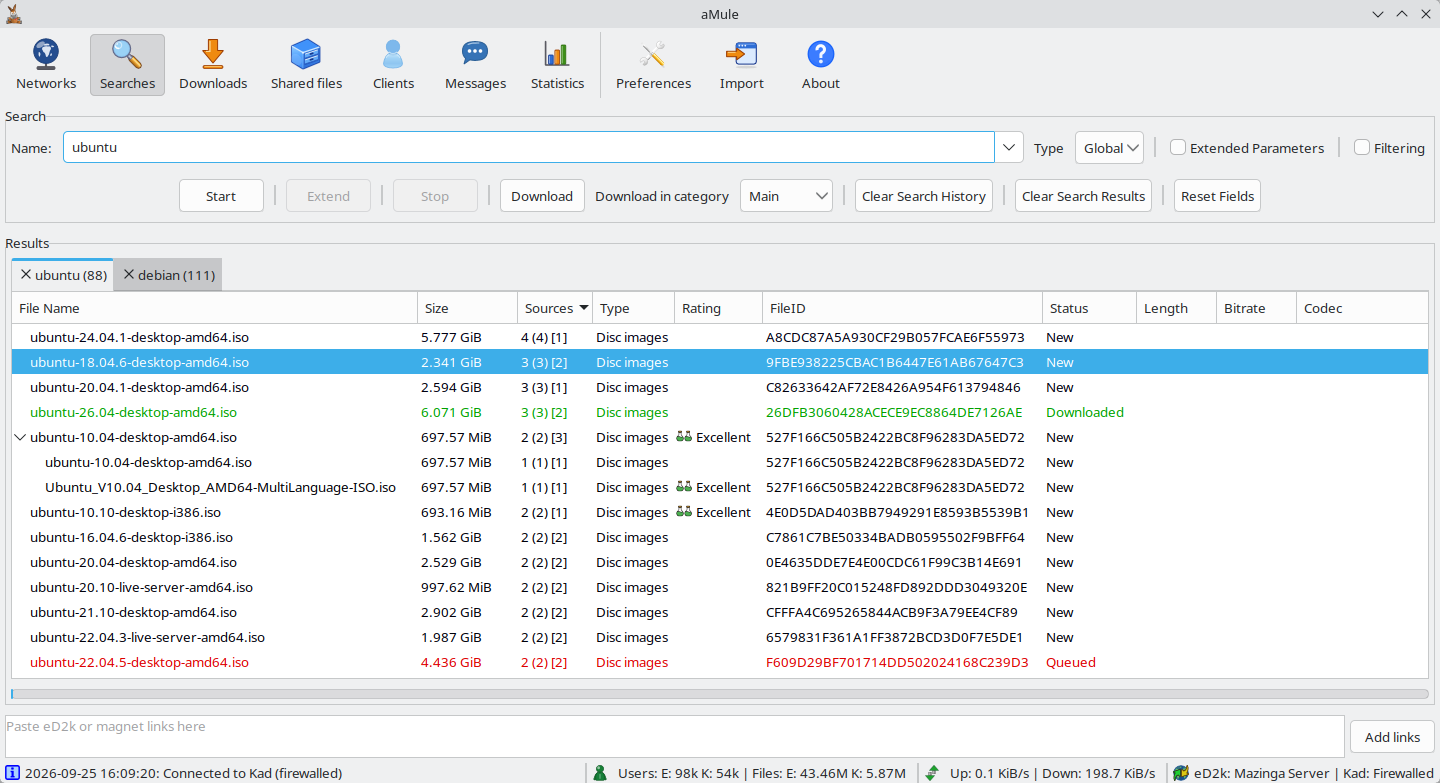
- Local — asks only the server you are currently connected to. Fast and usually enough.
- Global — asks every server in your list. Slower, but broader.
- Kad — searches the Kademlia network.
Double-click a result (or select it and click Download) to queue it:
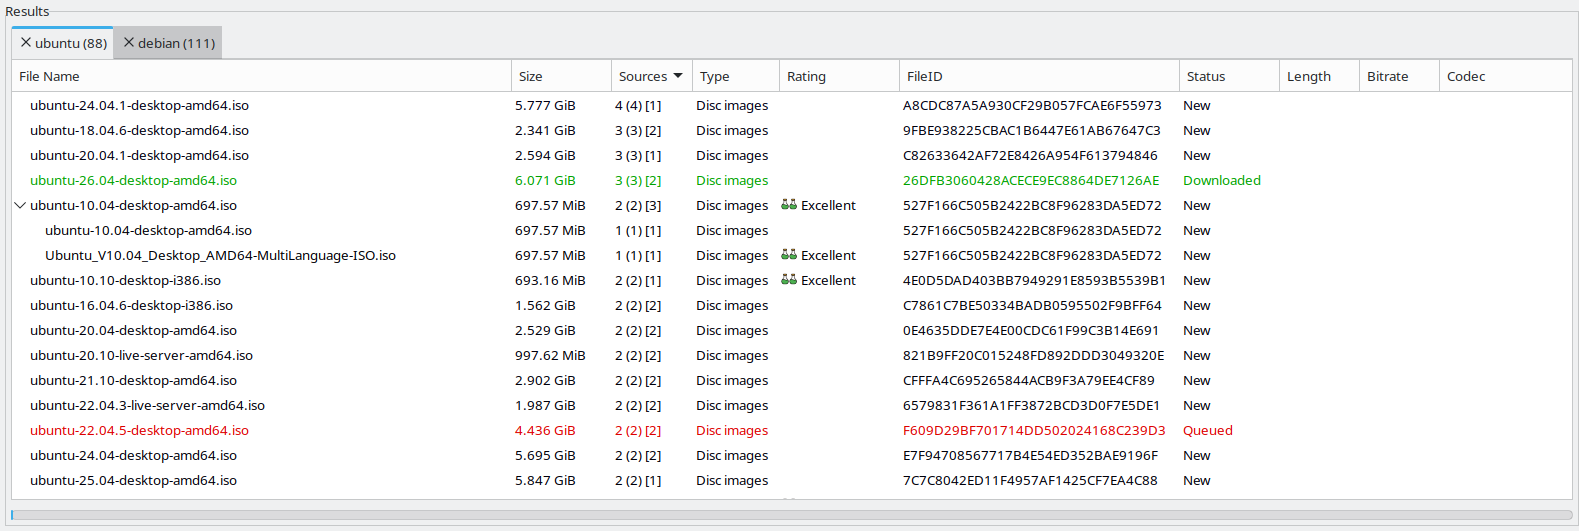
Results are colour-coded: blue = not downloaded (from the normal text colour with few sources to strong blue with many), red = already in your queue, green = already downloaded or shared, magenta = previously cancelled.
The Searches page also supports Boolean expressions (AND, OR, NOT), file-type and size filters, and a regular-expression result filter.
5. Manage your downloads
Click the Downloads button to open the Downloads window and watch your queued files:
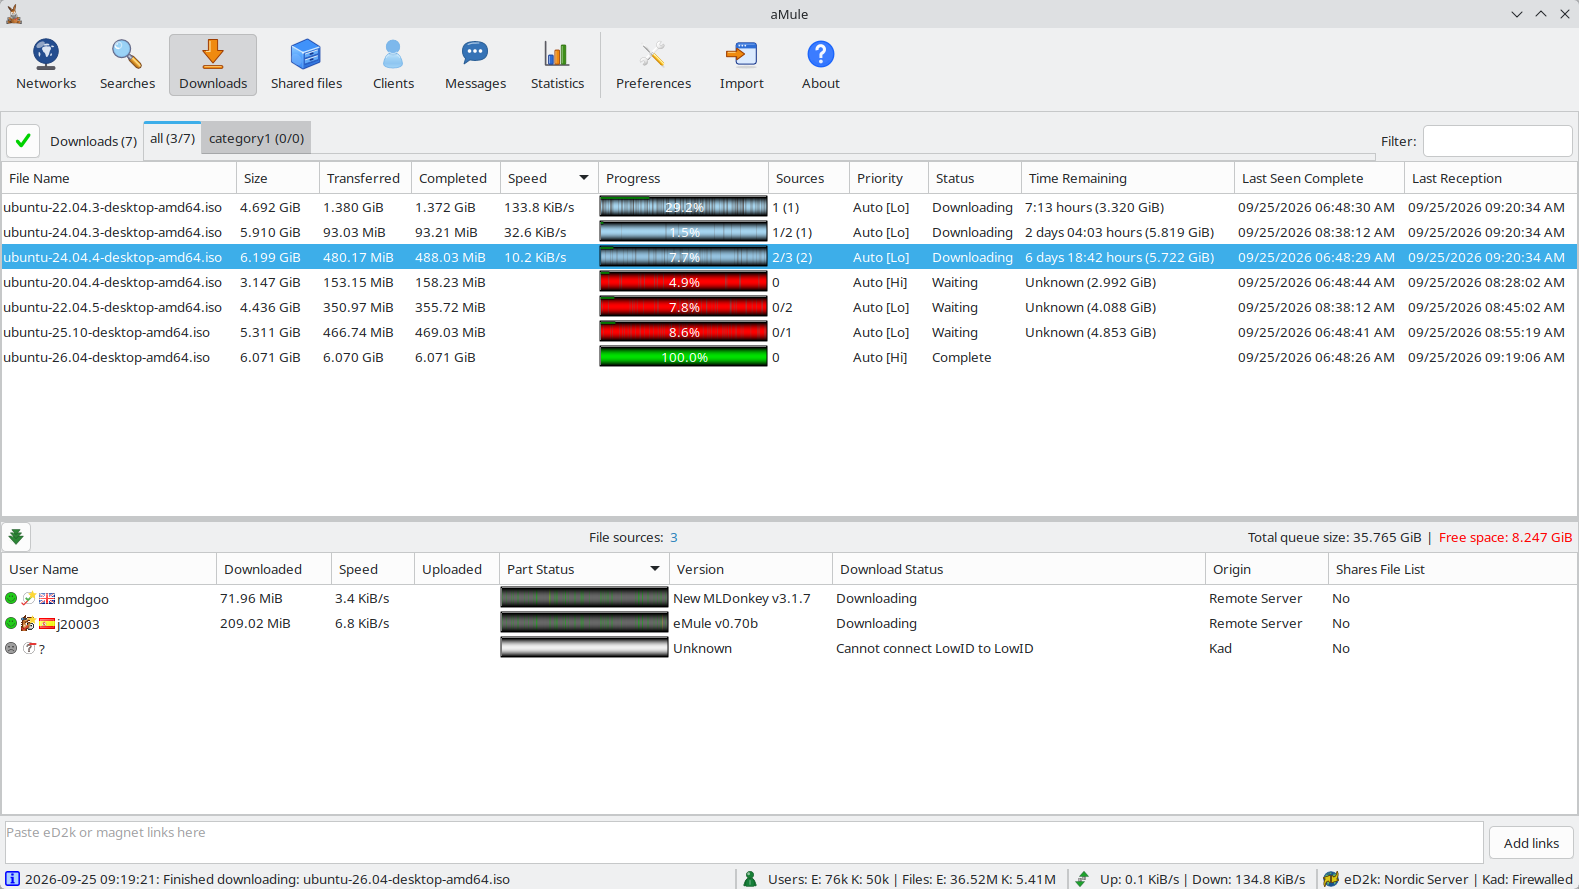
A quick way to read the progress bar: dark blue means many sources have the file, while red segments mean no known source has that part — those downloads are unlikely to complete. Click any file to see its sources in the list below.
The Downloads page documents the columns, source icons, and categories — named groups, each with its own colour and save folder — in full.
Where your files go
aMule keeps in-progress downloads in a Temporary directory and finished files in an Incoming directory. Both can be changed in Preferences → Directories; see Directories for the default paths on each platform.
6. Share files
It is your responsibility to ensure that you do not violate any laws regarding the material you share. There are two ways to share files:
-
Place files in your Incoming directory. Copy files there (see Directories for the path on your platform), then press the Reload button on the Shared Files page:

-
Add shared directories in Preferences. Open Preferences → Directories, browse to a folder, and double-click it to share it (or right-click to share it recursively, including subdirectories).
Keeping aMule up to date
aMule checks for a newer release on GitHub at startup and once a day while it runs. When one is available, it shows a New version available dialog:
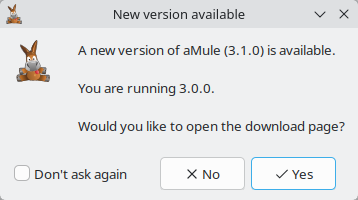
- Yes opens the GitHub releases page in your browser, where you can download the new version. See the Downloads page for which file to pick.
- No closes the dialog until the next start.
- Tick Don't ask again to stop the reminder for that version only; a later release shows the dialog again.
You can also check at any time with the Check for updates button in the About window. To turn off the automatic check, uncheck Periodically check for a new version in Preferences → General.
aMule installed from an operating-system package manager usually has no version check: updates come from the package manager.
Next steps
You now have aMule configured, connected, downloading, and sharing. To go further:
- Graphical interface reference — every window, button and preference in detail.
- Configuration — directories, firewall, UPnP, proxy and more.
- Troubleshooting and the FAQ — for slow speeds, Low ID, and other common problems.
- Remote interfaces — run aMule headless (
amuled) and control it from the WebUI or the command line. - P2P Networks — how the eD2k and Kademlia networks actually work.